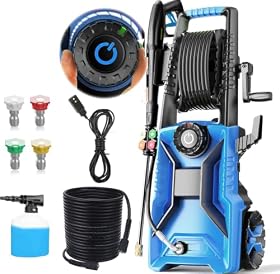
The best washer for painted wood siding is a pressure washer with adjustable pressure, a wide-angle nozzle, and a detergent option. Use the lowest effective pressure, keep the spray moving, and avoid forcing water behind the siding or under paint.
Best washer for painted wood siding
The best washer for painted wood siding is usually a compact electric pressure washer with adjustable pressure, a wide-angle nozzle, and a way to apply siding-safe detergent. Painted wood is more vulnerable than vinyl, brick, or concrete: excessive pressure can remove paint, expose bare wood, drive water behind boards, or worsen existing rot. Choose control over maximum PSI, and follow the siding and pressure-washer manufacturers’ instructions.
What to look for
Adjustable pressure or a gentle operating range
A washer with adjustable pressure gives you more control than a high-output model designed for concrete and decks. For painted wood, start at the lowest effective setting and increase only when necessary. The pressure shown on the machine is not the only factor; the nozzle, distance, spray angle, and water flow all affect the force reaching the siding.
A pressure washer that only operates at a high setting is a poor choice for older, weathered, or peeling painted wood. If the manufacturer does not provide a way to reduce pressure, maintain a greater distance and use a wider spray pattern—but do not assume that distance alone makes an aggressive washer safe.
A wide-angle nozzle
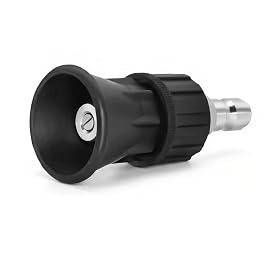
Use a wide spray pattern rather than a narrow, concentrated jet. A 40-degree nozzle is a common conservative starting point for delicate surfaces, while a 25-degree nozzle may be useful only when the surface and paint are in good condition and the spray is kept farther away. Avoid zero-degree and turbo nozzles on painted wood siding unless the siding manufacturer specifically permits them for a particular application.
Test the spray on an inconspicuous area first. If paint lifts, the wood fibers look raised, or the surface becomes visibly damaged, stop and reduce the pressure or switch to hand washing.
Detergent application
A detergent tank or siphon hose can make cleaning easier because detergent loosens dirt, mildew, and organic residue before rinsing. Choose a cleaner labeled for painted exterior surfaces and follow its dilution and dwell-time instructions. Do not allow detergent to dry on the siding.
A washer with a separate detergent intake is not essential, but it is convenient. A pump sprayer and a low-pressure rinse can work as well if the washer’s detergent system is poorly suited to the cleaner you need.
A manageable size and hose setup
A smaller electric washer is often easier to control around trim, windows, soffits, and corners. Hose length and cord length also matter: repositioning the machine is safer than stretching the hose or power cord until it pulls the washer over.
For electric models, use a properly rated outdoor extension cord only if the manufacturer allows one. Keep electrical connections away from standing water, use ground-fault protection where required, and stop if the cord, plug, or outlet becomes hot or damaged.
Recommended pressure-washing approach
1. Inspect the siding first
Look for peeling paint, soft or rotten wood, cracked caulk, loose boards, open joints, damaged trim, and gaps around windows and doors. Pressure washing can make these problems worse. Repair or stabilize vulnerable areas before cleaning, or wash those sections by hand.
If the paint is extensively peeling or the wood is deteriorated, cleaning is not a substitute for scraping, repair, and repainting.
2. Protect nearby areas
Close windows and doors, cover delicate plants and outdoor fixtures, and move furniture away from the wall. Be especially careful around exterior outlets, light fixtures, vents, and openings where water can enter.
3. Apply detergent from the bottom upward
When the cleaner’s instructions permit it, apply detergent in manageable sections from the bottom upward. This can reduce uneven streaking caused by dirty runoff. Allow the cleaner to dwell only for the time specified on its label, and keep the surface wet if directed.
4. Rinse from the top downward
Use the widest suitable nozzle and begin at a greater distance than you think you need. Keep the wand moving and spray at a shallow angle rather than directly into seams. Rinse from the top down so loosened dirt flows toward areas that have not yet been cleaned.
Never aim the spray upward behind siding laps, into soffit vents, or directly at window and door seals. Water forced behind the siding may be more damaging than the surface dirt you are removing.
5. Let the wood dry before judging the result
Painted wood can look uneven while wet. Allow the siding to dry fully before deciding whether another pass is needed. Repeated pressure washing can remove paint even when the first pass appears successful.
Product prices and availability are accurate as of the date/time indicated and are subject to change. Any price and availability information displayed on Amazon.com at the time of purchase will apply to the purchase of this product.
Pressure washer types compared
Compact electric pressure washer
This is usually the most practical category for painted wood siding. It is easier to control, generally adequate for light-to-moderate exterior dirt, and less likely to provide excessive output than many gas-powered units. Confirm the actual operating pressure and the available nozzles rather than choosing solely by the maximum advertised PSI.
Gas pressure washer
A gas unit can clean quickly, but its higher potential output makes it easier to damage paint and wood. It may be unnecessary for siding and requires more careful pressure control, nozzle selection, ventilation, fuel handling, and maintenance. Choose one only if you also need it for compatible heavy-duty work and can reliably operate it at a gentle setting.
Battery pressure washer
Battery models can be useful where power access is limited, but runtime and water delivery vary. They may be suitable for small areas or light cleaning. Check whether the unit can draw from the water source you plan to use and whether its pressure can be controlled enough for painted wood.
Product prices and availability are accurate as of the date/time indicated and are subject to change. Any price and availability information displayed on Amazon.com at the time of purchase will apply to the purchase of this product.
What PSI and GPM mean for this job
PSI describes pressure. Higher PSI can remove stubborn grime faster, but it also increases the risk of stripping paint or damaging soft wood.
GPM describes water flow. Higher flow can rinse dirt and detergent more quickly, but it does not make a high-pressure spray safer. A washer with moderate flow and controllable pressure is generally easier to manage on painted siding.
For this surface, maximum PSI should not be the deciding specification. Adjustable output, a wide-angle nozzle, detergent compatibility, and comfortable handling are more useful purchase criteria. Always defer to the siding, paint, and pressure-washer manufacturers when their recommendations differ from general guidance.
Product prices and availability are accurate as of the date/time indicated and are subject to change. Any price and availability information displayed on Amazon.com at the time of purchase will apply to the purchase of this product.
Nozzle and technique mistakes to avoid
Do not use a zero-degree nozzle on painted wood siding.
Do not start close to the wall; begin farther away and move closer only if the surface remains undamaged.
Do not hold the spray in one place.
Do not spray upward under siding laps or trim.
Do not direct high-pressure water at window seals, vents, outlets, or light fixtures.
Do not use a turbo nozzle simply because it removes dirt faster.
Do not pressure-wash loose paint, rotten boards, or visibly open joints.
Do not let detergent dry on the siding.
When hand washing is the better choice
Use a bucket, soft brush, or low-pressure garden-hose rinse when the paint is chalking, peeling, cracked, or old; the wood is soft; the siding has open joints; or the wall is near sensitive openings. Hand washing takes longer but gives you better control over fragile areas.
If cleaning exposes bare wood, causes widespread paint loss, or reveals rot, stop washing and plan for surface repair. A replacement pressure washer is not the right solution for a siding problem caused by failing paint or damaged wood.
Bottom line
Choose a controllable electric pressure washer or another unit that can operate gently, pair it with a wide-angle nozzle, and use detergent to reduce the need for aggressive spray. The safest method is to test first, work at low pressure, keep the wand moving, spray downward, and wash vulnerable areas by hand. For heavily peeling or rotten painted wood, repair and repainting should come before pressure washing.
FAQ
What PSI is safe for painted wood siding?
There is no single safe PSI for every painted wood surface because paint condition, wood softness, nozzle angle, spray distance, and siding construction all matter. Start at the lowest setting recommended by the equipment and siding manufacturers, test an inconspicuous area, and increase pressure only if the surface remains undamaged.
Can I use a 25-degree nozzle on painted wood siding?
Possibly, but a 25-degree nozzle is more concentrated than a 40-degree nozzle and should be used cautiously. Start farther away, keep it moving, and switch to a wider pattern if the paint shows any damage. Never use a narrow jet on loose or deteriorated paint.
Is an electric pressure washer better than a gas model for painted wood?
An electric model is often easier to control and may provide sufficient cleaning power for siding. A gas model can work if its pressure is carefully reduced and the correct nozzle is used, but its higher potential output increases the chance of damaging paint or wood.
Should I pressure-wash siding with peeling paint?
Usually not. Pressure washing can remove more paint and force water into damaged areas. Stabilize the surface, repair or replace deteriorated wood, and prepare it for repainting according to the paint and siding manufacturers’ instructions.