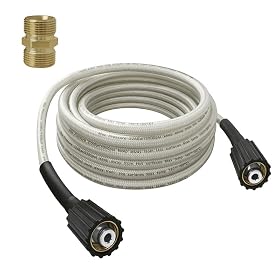
A leaking pressure washer wand connection is usually caused by a worn or missing O-ring, a loose or mismatched fitting, or damage to the quick-connect socket. Shut off the machine, release pressure, then inspect the seal and connection before replacing the wand or hose.
A pressure washer wand leaking at the connection is usually a seal or fitting problem—not a pump problem. Turn off the pressure washer, unplug it or disconnect the fuel-powered unit as appropriate, shut off the water, and squeeze the trigger to release trapped pressure. Then inspect the connection in this order: the O-ring, hose and coupler, fitting compatibility, and the wand itself.
Start with a safe pressure release
Never try to tighten or remove a pressurized wand connection. Before inspecting it:
Turn off the pressure washer.
Disconnect electrical power, or shut down the engine according to the manufacturer’s instructions.
Turn off the water supply.
Squeeze the spray-gun trigger until water stops flowing.
Allow the connection to cool if the machine or water is hot.
Wear eye protection when checking a pressure washer connection. Do not operate the machine if water is spraying toward electrical connections, the motor, or the engine.
Check the O-ring first
A missing, flattened, cracked, cut, or dry O-ring is the most common cause of a leak at a quick-connect wand fitting. Remove the wand only after pressure has been released and look inside the female coupler or at the male plug, depending on the connection design.
Check that:
The O-ring is present and seated in its groove.
The ring is round rather than flattened on one side.
There are no cuts, cracks, or hard, brittle sections.
Dirt, sand, or old seal material is not preventing it from seating.
Clean the fitting with a lint-free cloth. If the O-ring is damaged, replace it with the correct size and material specified for the pressure washer. A general-purpose household O-ring may not be suitable for pressure, water temperature, or cleaning chemicals.
A small amount of lubricant approved by the pressure washer manufacturer can help an O-ring seat properly. Do not use a lubricant unless the manufacturer allows it, and do not substitute thread sealant for an O-ring on a quick-connect fitting.
Product prices and availability are accurate as of the date/time indicated and are subject to change. Any price and availability information displayed on Amazon.com at the time of purchase will apply to the purchase of this product.
Inspect the hose and coupler
If the O-ring looks good, examine the hose end and the coupler that accepts the wand. Look for:
A bent or damaged quick-connect plug
A cracked coupler sleeve
Corrosion or pitting on the metal fitting
Dirt inside the coupler
A hose end that is loose, swollen, or cracked
A connection that will not fully lock into place
Pull the coupler sleeve back, insert the wand completely, and release the sleeve. Gently pull on the wand to confirm it is locked. Do not force a fitting that does not align smoothly. A partially engaged quick-connect can leak and may separate when the trigger is pulled.
If the hose itself is leaking near the fitting, replacing only the wand will not solve the problem. The hose or its end fitting may need replacement.
Product prices and availability are accurate as of the date/time indicated and are subject to change. Any price and availability information displayed on Amazon.com at the time of purchase will apply to the purchase of this product.
Confirm the fittings are compatible
Pressure washer accessories can look similar while using different connection styles or sizes. Check that the wand, spray gun, hose, and adapter are designed to connect to one another. Do not rely on the parts appearing to fit.
Potential mismatch problems include:
Different quick-connect sizes
A consumer accessory connected to a commercial-style fitting
Metric and inch-threaded parts
A wand adapter installed backward or incompletely
A damaged adapter used to make otherwise incompatible parts fit
Avoid forcing threaded fittings together or using excessive thread tape. Thread tape is intended for compatible threaded joints; it does not repair a damaged thread and should not be placed where it could enter the water passage. Follow the pressure washer and accessory manufacturer’s instructions for threaded connections and sealants.
Product prices and availability are accurate as of the date/time indicated and are subject to change. Any price and availability information displayed on Amazon.com at the time of purchase will apply to the purchase of this product.
Look for damage to the wand
Inspect the wand tube, handle, threaded ends, and quick-connect plug. A wand that has been dropped, frozen, run over, or overtightened can develop a hairline crack or distorted connection surface.
With the machine off and depressurized, check whether the leak comes from:
The joint between the wand and spray gun
The joint between the hose and spray gun
The wand tube itself
A threaded adapter
The nozzle connection at the front of the wand
Dry the area, reconnect the parts correctly, and briefly turn on the water without starting the pressure washer. Water appearing before the pump runs can help identify a hose or fitting leak. Keep hands away from the spray tip and stop if water is directed toward electrical components.
A cracked wand, damaged quick-connect plug, or distorted coupler should generally be replaced rather than repaired. High-pressure adhesive, epoxy, and improvised clamps are not reliable repairs for pressure-bearing parts.
Product prices and availability are accurate as of the date/time indicated and are subject to change. Any price and availability information displayed on Amazon.com at the time of purchase will apply to the purchase of this product.
Check the nozzle and front connection
If the leak appears near the end of the wand rather than at the spray-gun connection, remove and inspect the nozzle. A missing nozzle O-ring, damaged nozzle plug, or partially engaged quick-connect can allow water to escape.
Clean the nozzle and fitting, verify that the nozzle is the correct type for the wand, and reinstall it fully. Do not run the pressure washer with a loose nozzle. If the nozzle cannot lock into place or the fitting is visibly damaged, replace the affected accessory.
What if the leak continues?
If a new, correctly sized O-ring does not stop the leak, the sealing surface may be scratched, the coupler may be worn, or the hose or wand may be damaged. Replace the failed part with one listed as compatible with your pressure washer and its operating pressure.
Replace the complete wand or hose when:
The metal tube or plastic body is cracked.
The quick-connect fitting is bent or badly worn.
The hose is swollen, split, or leaking at the crimped end.
The connection separates under light pulling force.
The correct replacement seal does not solve the leak.
If the leak is coming from the pressure washer body, pump outlet, or an internal connection rather than the wand assembly, stop using the machine and consult the manufacturer or a qualified repair professional. Do not open a pump or electrical enclosure unless the service instructions specifically allow it and you are qualified to perform the work.
When to replace the pressure washer
A leaking wand connection alone usually does not justify replacing the entire pressure washer. A seal, hose, coupler, or wand is normally the more reasonable replacement.
Consider replacing the machine only when the leak is accompanied by pump damage, repeated failures across multiple connections, unavailable replacement parts, or repair costs that approach the value of the unit. Use the manufacturer’s parts information to confirm compatibility before ordering.
Can I use Teflon tape to stop a pressure washer wand leak?
Only use thread tape where the manufacturer specifies it for a compatible threaded connection. It will not fix a missing O-ring, quick-connect leak, cracked wand, or damaged fitting, and excess tape can enter the water passage.
Why does my pressure washer wand leak only when I pull the trigger?
Pressure may be forcing water past a worn O-ring, partially engaged quick-connect, damaged hose end, or cracked fitting. Depressurize the machine, inspect the seal and coupler, and replace damaged pressure-bearing parts.
Can I replace the O-ring in a pressure washer wand connection?
Usually, yes, if the connection is designed with a replaceable O-ring. Use the size and material specified by the manufacturer, keep the groove clean, and replace the fitting or wand if the sealing surface is damaged.
Is it safe to use a pressure washer with a leaking wand?
No. A leak can worsen, reduce control, or cause a fitting to separate under pressure. Shut down and depressurize the machine before inspecting it, and replace damaged parts rather than attempting an improvised repair.